
A good ERP should respond to the needs of each company, using open-source software allows you to customize each instance according to the information and process requirements of each company.
Descendant selectors.
They are similar to child selectors but do not require the relationship between matching elements to be strictly between parent and child.
The forward slash: /
It serves to start from the root element but only allows finding those that are below this node.
Example: /app
The double forward slash: //
Works if I want to select any element that is below the root, that is, a child of some element other than the root, such as abstract or note.
Example: //note
The forward slash, followed by another forward slash: /node/node
It works when there are several nodes and I want to identify one through the path of the parent.
Example: /app/abstract
The forward slash, followed by the double forward slash: /node//node
It works just like the previous example, but we are being more precise. It works when the second node is not a direct child of the first.
Example: /app//note
Double forward slash, forward slash, and two dots: //node/..
It works when we do not know the direct information of the superior node we want to reach, but we have the child node. The two dots indicate that we are going to go to the parent of the mentioned node.
Example: //note/..
Order type selectors.
First and last
If we want to bring the first or last note, we use the word first or last.
Example: //note[last()]
Operations
We can also do simple operations, for example, if we want to call the penultimate line, we can subtract 1.
Example: //note[last()-1]
Let's go to our instance!
Suppose you need to add some fields to our purchase quotations, to achieve this, follow these steps:
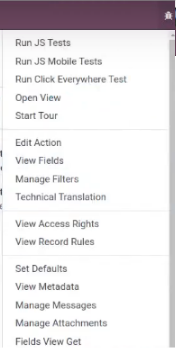
1. Access your Odoo test database, load the form view, and activate debug mode.

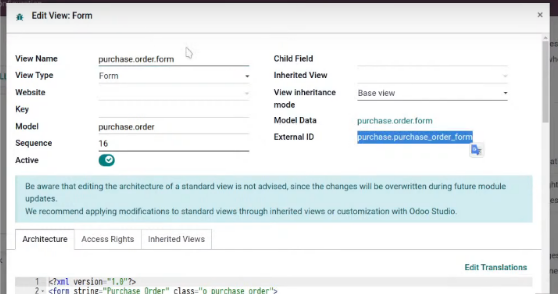
2. Expand the view information in Edit: View Form.
3. At the moment of editing the view you already have the External ID.
4. Confirm that your XML browser shows the same section.
5. Go back to Edit: View Form, and look for the title (which is h1), this code is what puts the name of our quotation in bold and large.
Note:
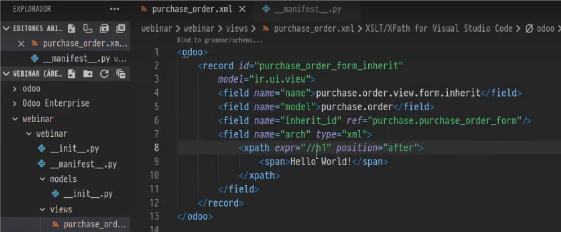
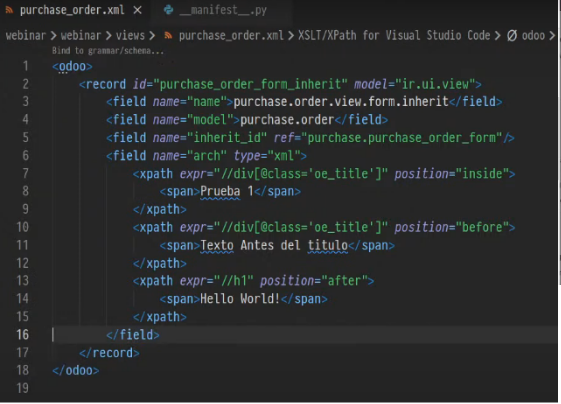
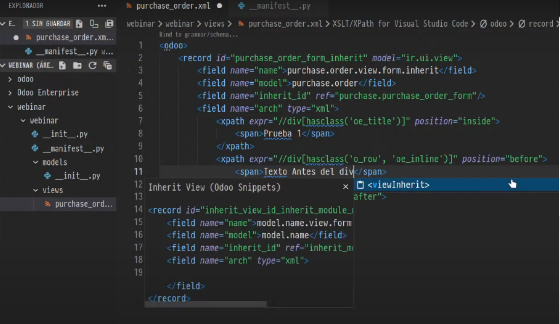
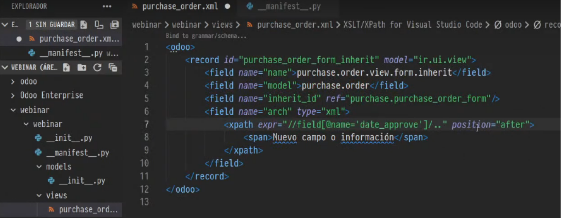
When you are already working with view inheritance, you have to declare the Id field that identifies the view you are creating, the model to which it belongs, include a name for the model where this view is included, and the view that inherits. That is, you are going to work with something that is already created and you will add new information to it, either a new field, text, etc.
6. Evaluate the expr expression, and the position, if we want before, after, or inside this element.
<XPath expr=”//h1” position=”after”>
<XPath expr=”//h1” position=”before”>
<XPath expr=”//h1” position=”inside”>
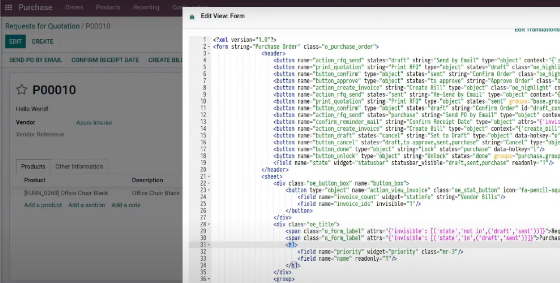
7. Display the view of your quote in Edit View: Form of your Quotes app, and look for the expression you are going to evaluate.

8. Go back to the XML, and create a div and a class. You must create another XPath, this is the expression you are going to evaluate: give me a div whose class is oe, and inside put me Test 1. You can test with the options of before, after, and inside.
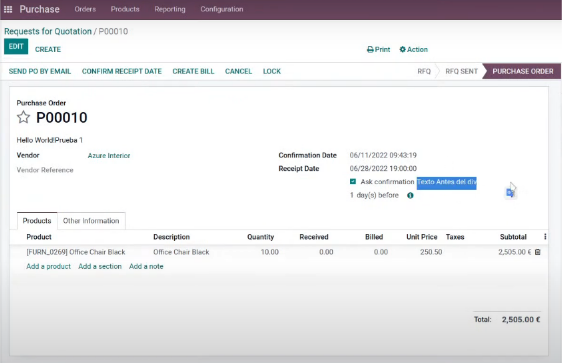
Now you can reload the view of your quote. You will be able to see the changes made, with the texts Text before the title, Hello World, and Test 1.
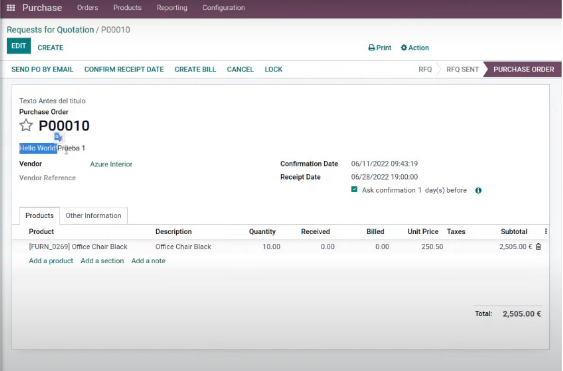
You did it!
Now we want to share another way to implement it.
Within your XML, you can change class to hasclass, a method that Odoo includes to search by classes.
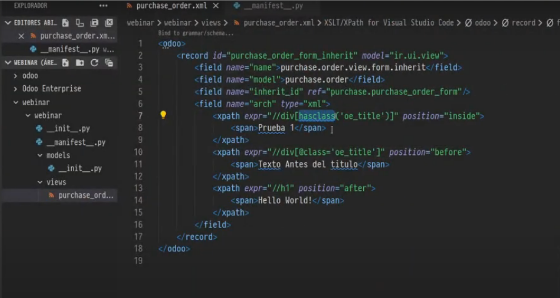
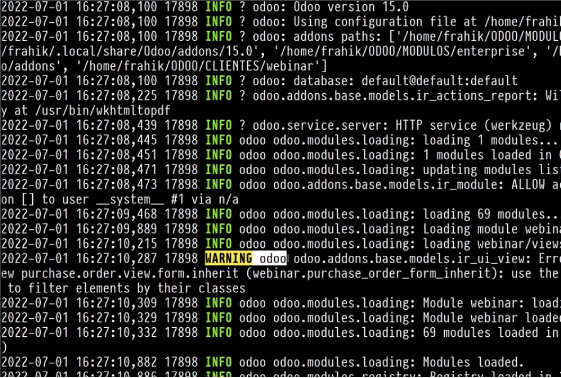
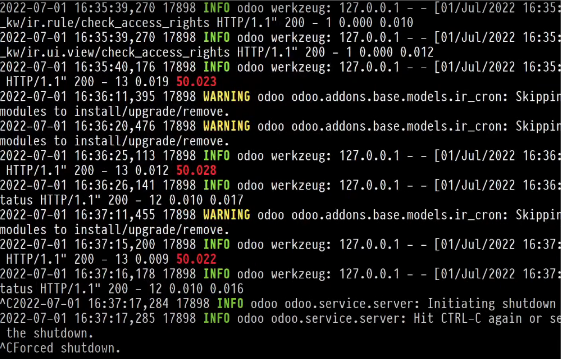
Using this technique you can avoid the following warning in your Odoo service:
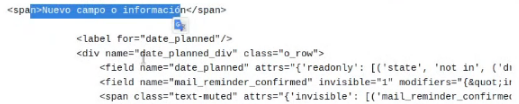
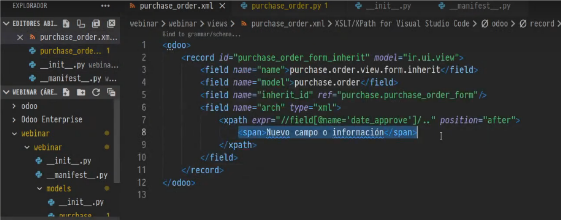
Now you can go to the XML to modify the <span> part
.
If you go to your quote in Odoo, you will see that now the text is in the underlined section:
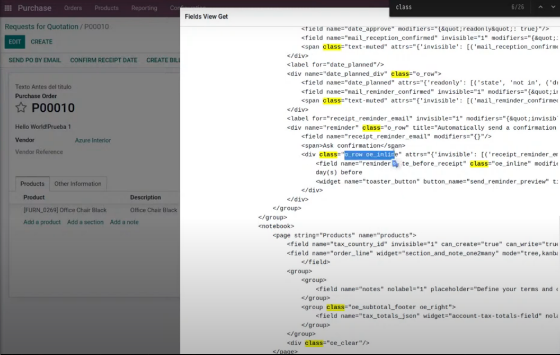
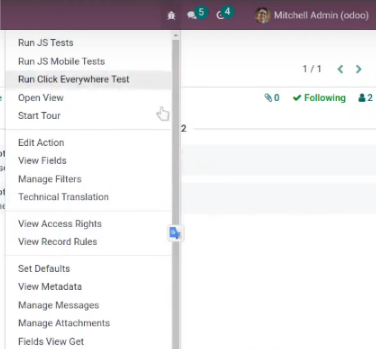
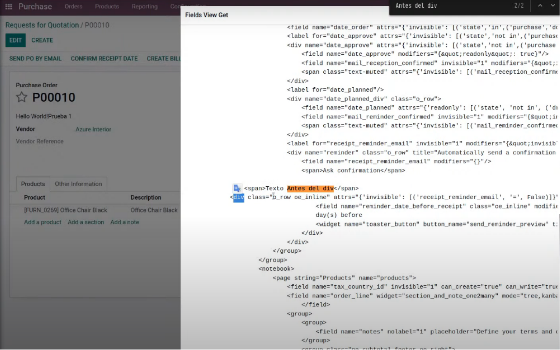
Now, if you go to Fields View Get.
You can see that it was placed before the div, as indicated.
Now, imagine that you need to add a Check box in your quote view, you can also do this by going to your XML, and following the next steps:
a. Go to the parent div, and then add the new information.
b. When you refresh your Quotes app, you will see that the field we added already has the text, but we need to add the format to make it an available checkbox.
c. In Field New Get, look for the XPath, here you will see that you need to add the format.
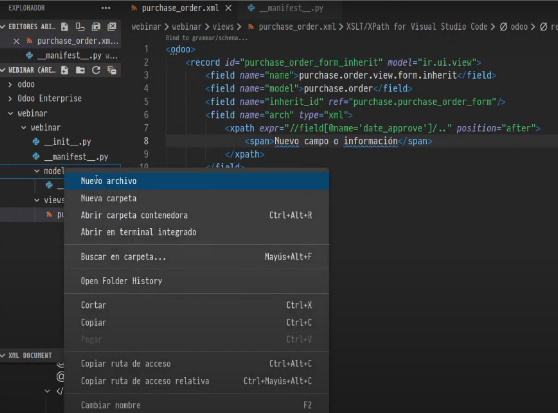
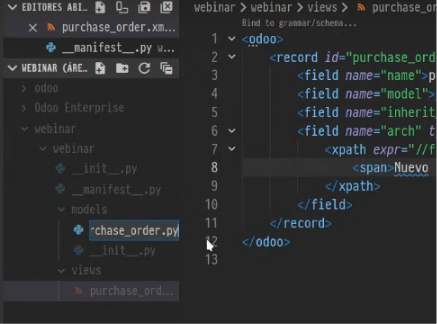
d. Back in your XML, create a New file from model, in this case you can name it purchase_order.py
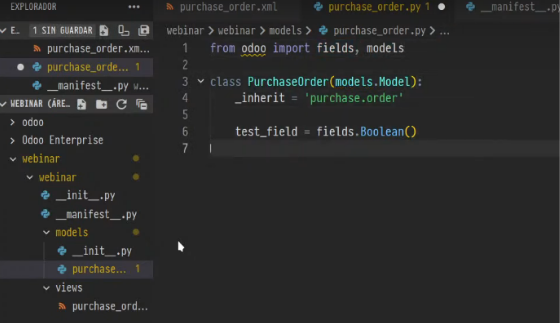
e. EIn it, import the PurchaseOrder model, and a new field. For this exercise, we will use a test Boolean field.
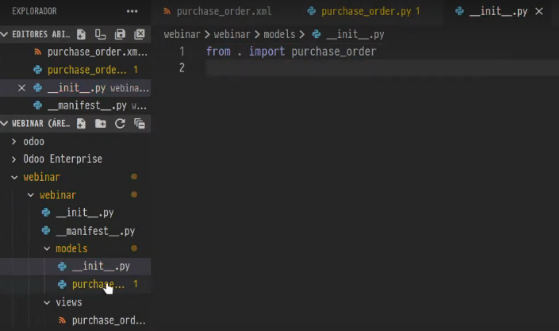
f. Load the new file in _init.py
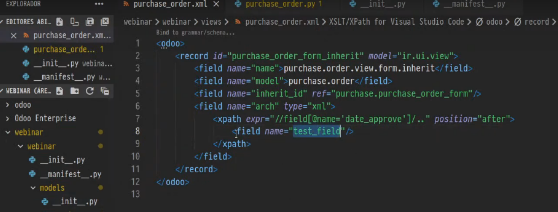
g. Now you can go to purchase_order.XML
h. And add your test field.
i. Stop the Odoo service and restart it, updating the app in which the recent changes are located, as we must remember that we will no longer be loading only the XML but also the Python. This way we can render the field correctly.
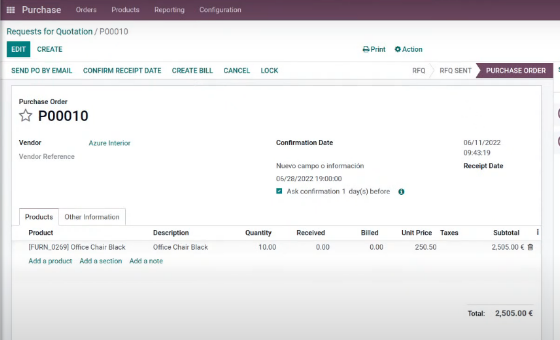
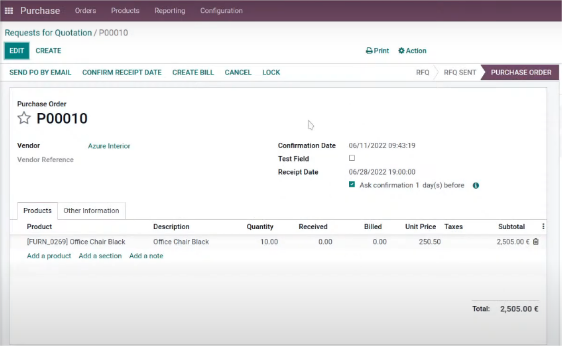
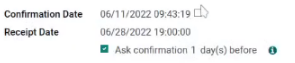
When you visit our Purchase app again, you will see your checkbox under the first text and with the ability to select and deselect it.
If instead of this you prefer the box to appear next to your first row, what you need to do is remove the parent code of the div in the XML (that is, the two dots).

Now you can take advantage of this process to include all the essential information for your company within your Odoo apps.
En Vauxoo nos gusta que las instancias cuenten con toda la información importante para la empresa, sin embargo, no experimentamos directamente desde las instancias propias ni de nuestros clientes; para hacer esto te recomendamos acceder a runbot to work from an Odoo test instance, from which you can see the final result of your exercise.